
For a couple of years I have looked on enviously at the many battery boxes that innovative ham radio operators have put together to power their equipment while on portable ops. POTA and public service events in particular, often run for longer time periods, or need higher transmit power levels than that offered by an HT. A portable battery box is an ideal solution to extend run time and/or allow higher transmit power.
In this article, I would like to describe my portable battery box solution for POTA and portable operations that will allow me to run my equipment for longer periods and at higher transmit power than my HT’s can achieve. It also has 110 volt power outlets to run my laptop and additional 12 volt outlets that will let me recharge an HT battery for example.
Previously I have used a variety of methods to power my radios for portable work such as supporting the MS Bike Tour and Rideau Challenge Journey, often cobbling together a spare car starting battery to run my higher power mobile radios and an inverter to charge a laptop and HT batteries. Not the tidiest of solutions.
12 volt lead acid batteries are heavy and, if repeatedly drawn down below about half of their rated Ah capacity, they tend to lose that capacity over time. Lithium Ferro Phosphate (LFP or LiFePO) batteries have become much more affordable and offer their full rated capacity for over 2000 recharge cycles.
Go kits and battery boxes have become commonplace over the last few years, especially as portable operations seem more popular than ever, so there were plenty of pre-built options to choose from. A quick market survey however showed the pre-built options to be somewhat pricey by my frugal standards!
Even empty battery boxes, ready for you to add a separately purchased battery and outlets seemed expensive.
Some pre-built options are summarised in the table below and range from $699 US for a fully functional battery box to just over $27 CAD for an empty box. There are many more options available online.
Prebuilt Options Table
| Supplier | Make | Model | Output/Equipment | Battery | Cost ($) |
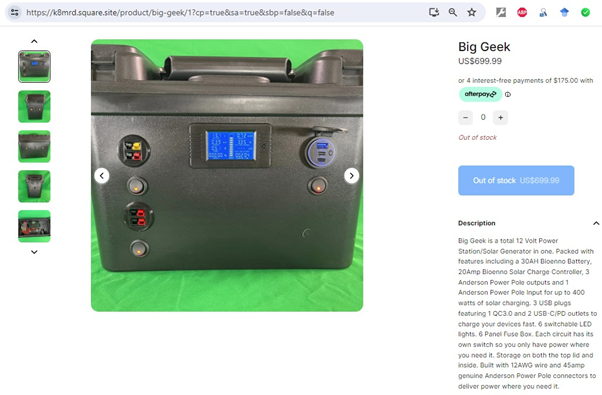
| K8MRD | Own brand | Big Geek | Power Poles, USB, 6 LED lights, Solar Charge Controller | 30Ah LiFePO | 699 US |
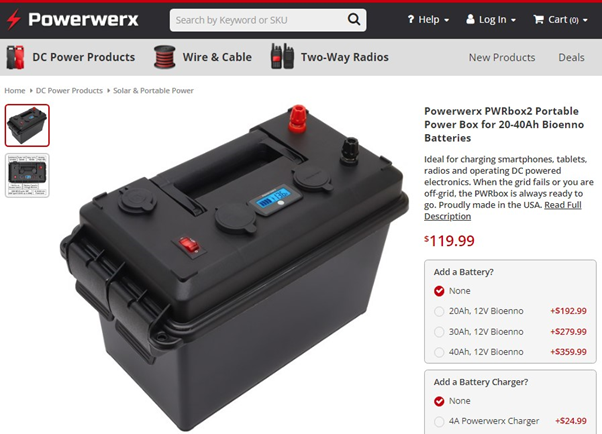
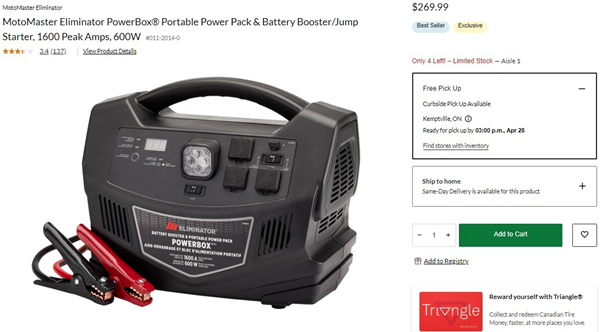
| Powerwerx | Powerwerx | PowerBox 2 | Power Poles, USB, 12 cigarette lighter | 30Ah LiFePO | 279.99 US |
| Powerwerx | Powerwerx | PowerBox 2 | Power Poles, USB, 12 cigarette lighter | 119.99 US | |
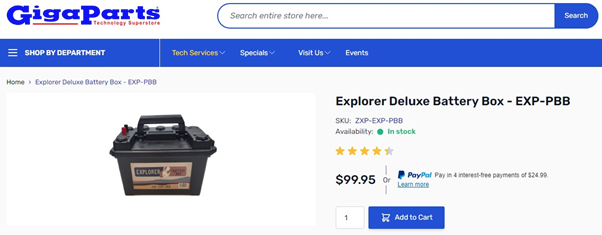
| GigaParts | Own brand | Explorer Deluxe | Power Poles, USB, 12 cigarette lighter | None | 99.95 US |
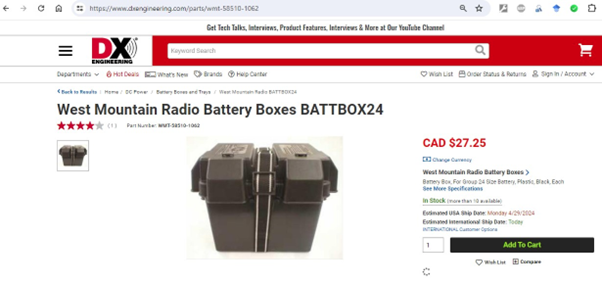
| DX Engineering | West Mountain Radio | Battery Box | None | None | 27.25 CAD |
Interestingly none of the commercial products offered an inverter and with their relatively high cost, it seemed there might be a better way. Step forward a used MotoMaster portable powerpack.
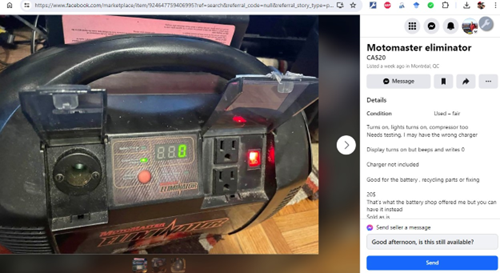
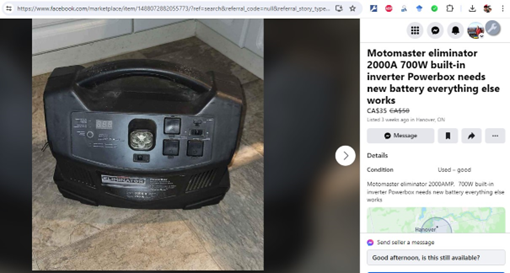
So, last fall I invested a bit of time in checking the used market on Facebook Marketplace and Kijiji, and identified that there were a few used MotoMaster style portable powerpacks/boosters for sale at very good prices. These were originally supplied with a lead/acid battery and if not charged frequently, the battery would fail to hold a charge after just a couple of years. It seemed that often the original purchaser would buy a new unit rather than replace the battery, sometimes selling the old one at a very reasonable price.
I figured one of those would make a well manufactured battery case, with existing 110 volt AC inverter, some USB and 12 volt DC power outlets. All it would need is a replacement 12 volt LiFePO battery and some modifications to add PowerPole outlets.
Originally retailing at $269 CAD at Canadian Tire, I was able to pick up an old MotoMaster Powerbox 600 with a dead lead-acid battery for just $15 from Smiths Falls, and this became the basis for my portable power station.
A quick check on the popular used goods websites identified these current options (as at May 2024) at $20 to $35 asking price.
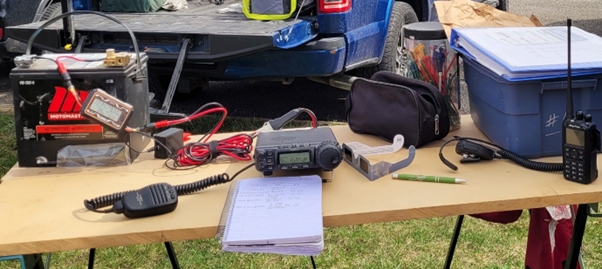
The pictures and descriptions of my battery box re-build will take over from here.
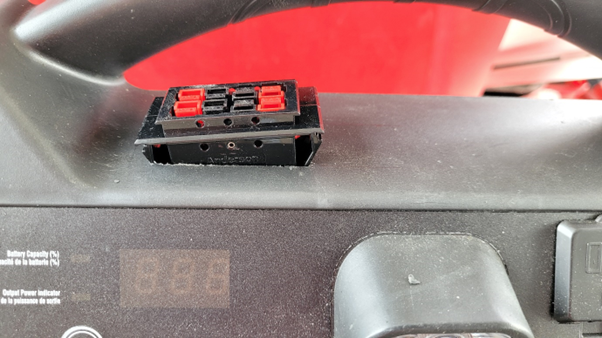
I first opened up the battery box to check the dimensions of the original lead acid battery as that would pretty much dictate the space available for a replacement battery. It also allowed me to size up potential locations for a Powerwerx 4 PowerPole outlet that I purchased from Ham Radio Outlet for about $15. I selected the four outlet model since the cost was only a couple of dollars more than the two outlet model and I was sure I had the space to install it.
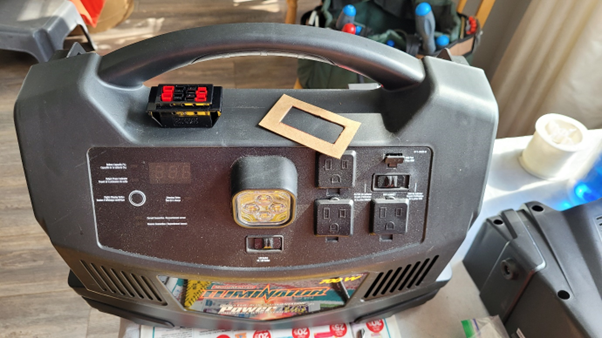
My selected location for the PowerPole outlet was on the top, where it would be close to existing wiring points and have a sufficient large and relatively flat space for the mounting hole to be cut.
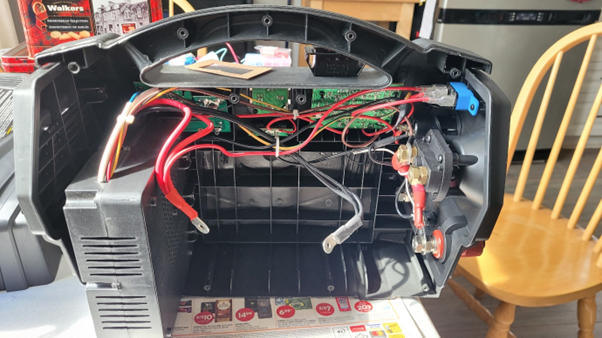
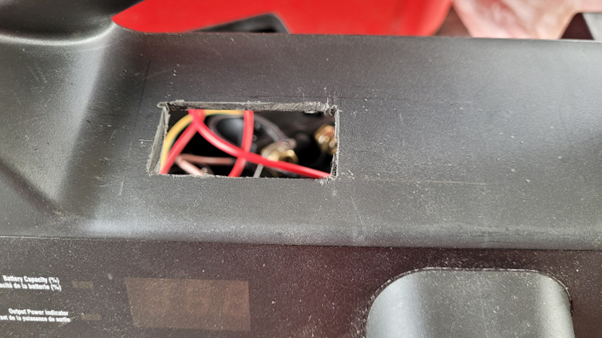
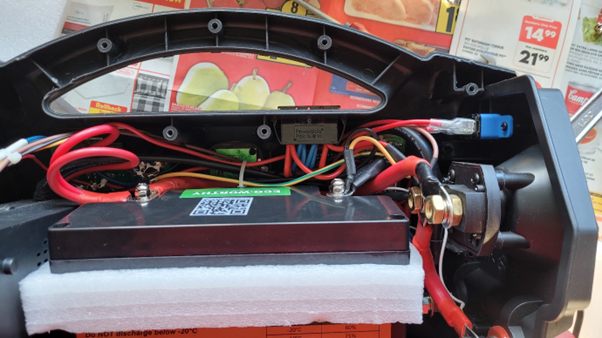
Photo 10 shows the inside of the Power Box. The 110 volt inverter is on the left. The visible green circuit boards are for the USB and 110 volt outlets; the LED light and the display.
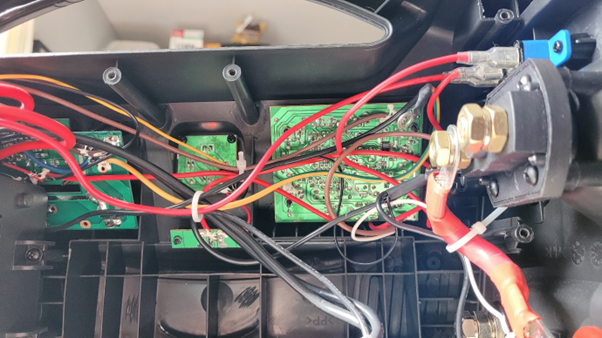
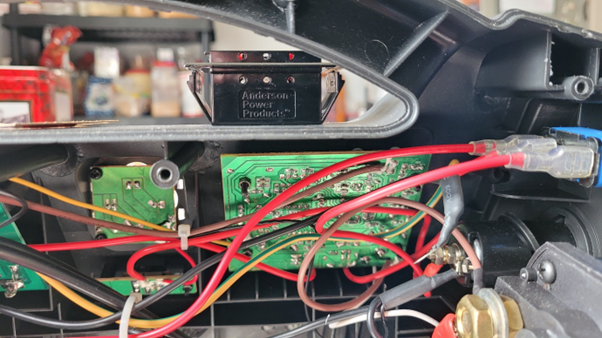
Photo 12 shows my chosen location to mount the PowerPole outlet and was one of the few areas that were flat and large enough for the hole to be cut to allow flush mounting.
I created a card template to the correct dimensions for the mounting hole and drew the outline on the top of the power box. I then used a Dremel tool with cutting disc to cut the hole.
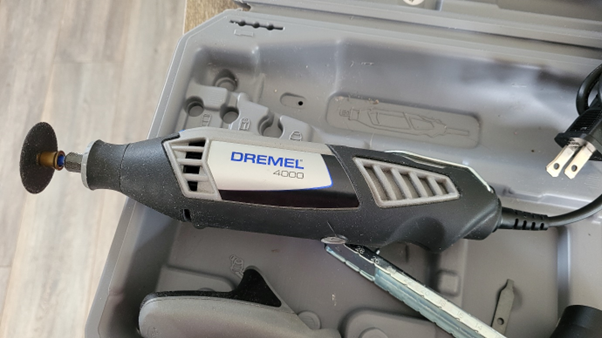
Once the hole was cut it needed some additional trimming with a box cutter knife to fit the PowerPole outlet.
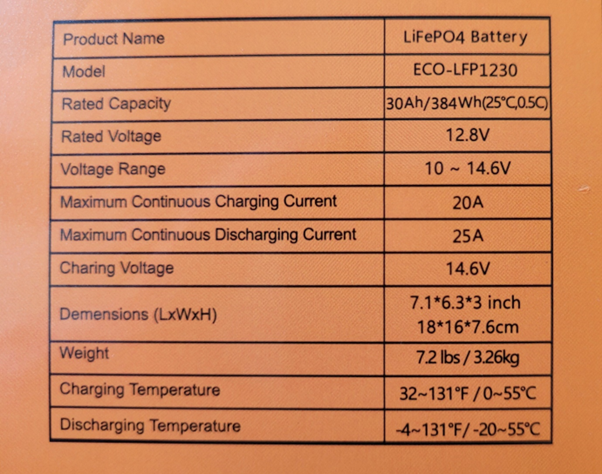
For the battery, I selected the 30 Ah LiFePO from Eco-worthy. I made my choice based on the dimensions, since it had to fit in the existing space where the 32 Ah lead acid battery was removed from, and the maximum discharge current of 25 Amps, which should allow a 100 W radio to run at maximum output power. Cost was also a factor with the Eco-worthy costing $130 CAD.
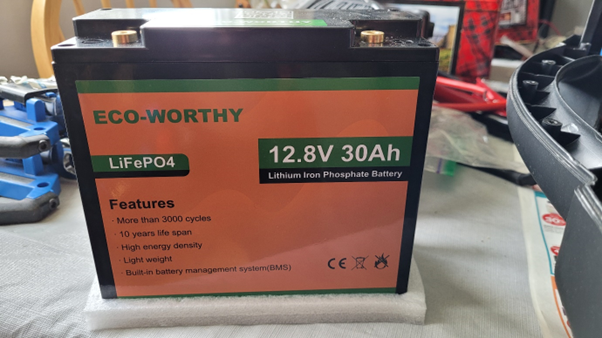
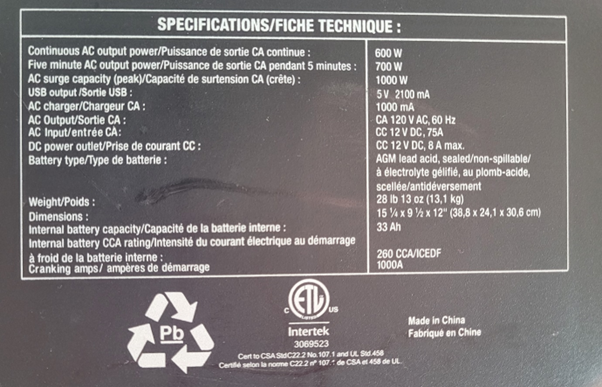
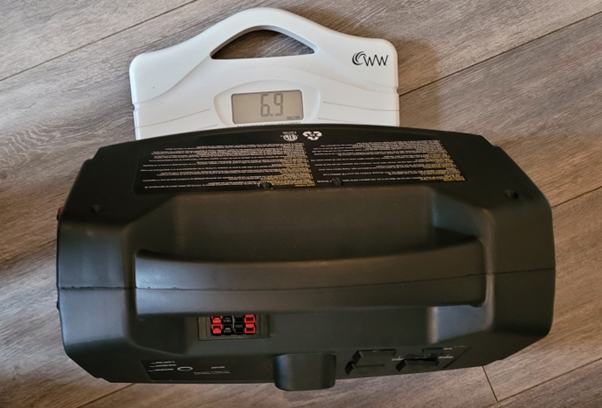
The original specification of the battery box was a 33 Ah lead acid battery and a total weight of 13.1 kg. I was expecting a big weight saving.
The next step was to wire up the battery box, starting with a sub-harness for the PowerPole outlet. I chose to use two positive side and two negative side wires for power to two pairs of PowerPoles, then short jumper cables to connect the remaining two outlet pairs. Since the battery can only supply 25 Amps maximum, it would not be possible to draw the rated 35 Amps from each PowerPole outlet pair. By wiring two sets of PowerPoles in parallel I would save wire, speed the install and yet give sufficient current handling for all expected situations.
The following series of photos show the wiring sub-harness for the PowerPole outlet.
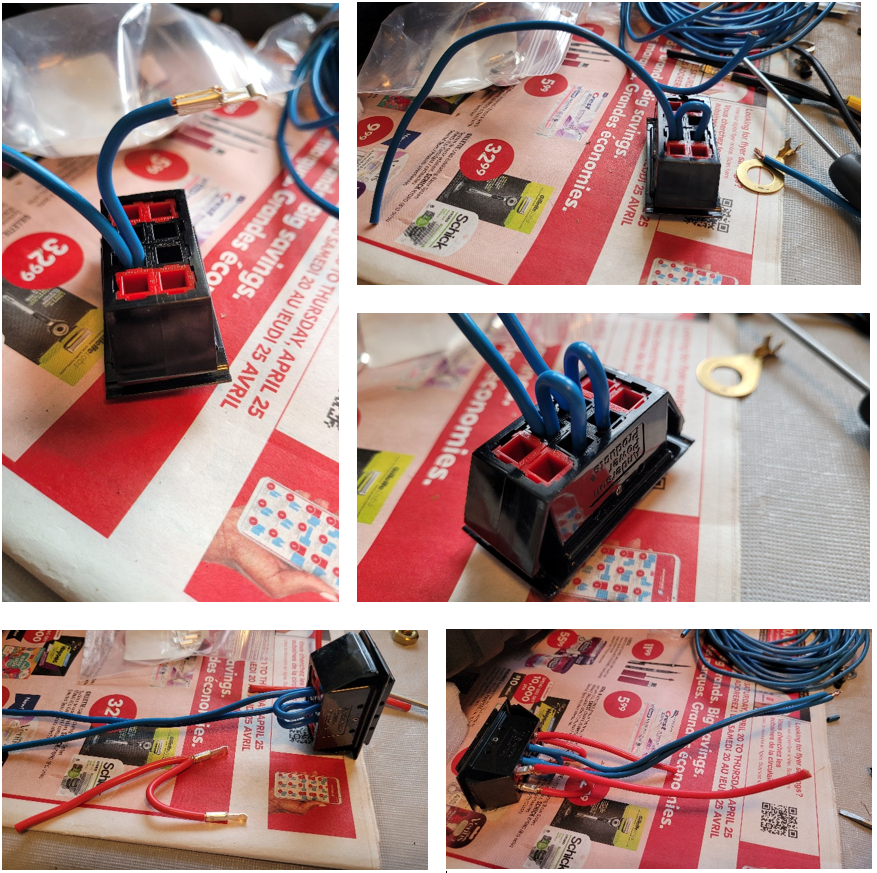
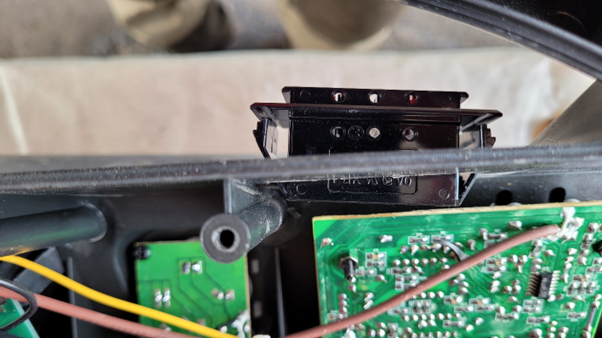
It was then time to install the PowerPole outlet and battery. The existing wiring loom was retained and routing adjusted to match the slightly different battery terminal locations on the new battery. The PowerPole outlet was wired through the existing On/Off switch on the end of the battery box, so that all outlets could be shut off with one switch.
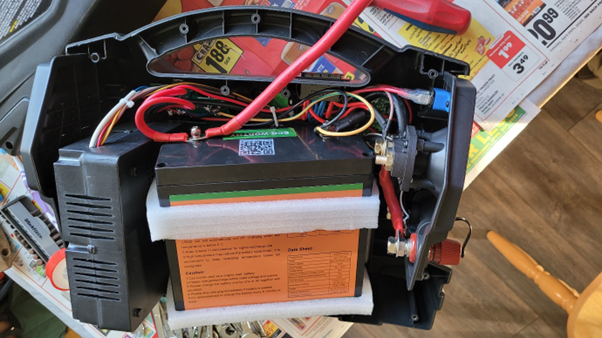
Foam packaging from the battery shipping was used to take up any space and ensure that the battery was held in place.
Once everything was in place and all outlets were tested for functionality, the battery box could be reassembled and given a final test.
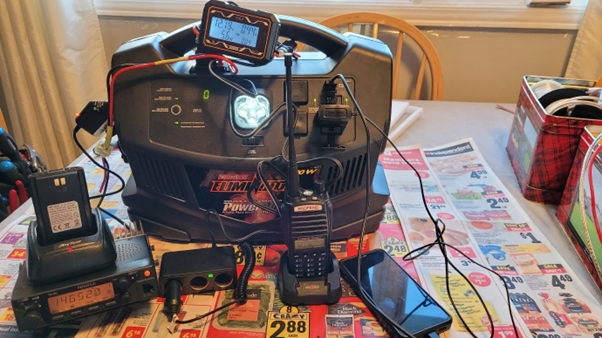
For the final battery box final test I powered the LED light, a Kenwood 2m mobile radio from the PowerPole outlet, through a power meter; an HT battery charging through the 12 volt cigarette lighter output (on left side of photo); a triple cigarette lighter expander connected to the PowerPole outlet and running a second HT charger; a 110 volt receptacle powering a cell phone charger and finally the USB outlet charging the cell phone that took the photo. All worked as expected.
Next step and remaining work. The original PowerBox battery was charged with a 13.6 volt 1 Amp wallwart. Since the Lithium battery needs 14.6 volts to fully charge it an additional circuit will be added to step up (boost) the original charging voltage to between 14.2 and 14.4 volts. This should allow nearly a maximum charge on the battery, while maintaining the longevity of the battery.
Further testing of the display will determine if it is correctly identifying the load through the 110 volt receptacles and USB port. Since the PowerPole outlet is separated from the existing wiring it is unlikely to be included in that display.
Finally the completed battery box was weighed and 6.9 kg is the new weight, almost half of the original! Allowing for the fact that the lead acid battery should only be used to half of its rated value, ie 16 Ah and the lithium battery has 30 Ah available, this is a win-win with about half the weight and twice the power!
The total cost for my battery build was ($ CAD):
Original MotoMaster power box: $ 15
New Eco-worthy battery $130
Powerwerx PowerPole outlet: $ 15
TOTAL: $160
I have purchased a boost converter for $2.50 from Aliexpress but not installed it yet. The commercial power boxes do not include a charger.
The nearest commercial equivalent would be the Powerwerx Powerbox2 with 30 Ah LiFePO battery at $280 US.
Conclusion. An enjoyable build project with satisfying savings over a commercial equivalent. Full testing and installation of the charging booster to follow.
Rob, VE3RXH
Appears in: Rambler Vol.66 Issue 10